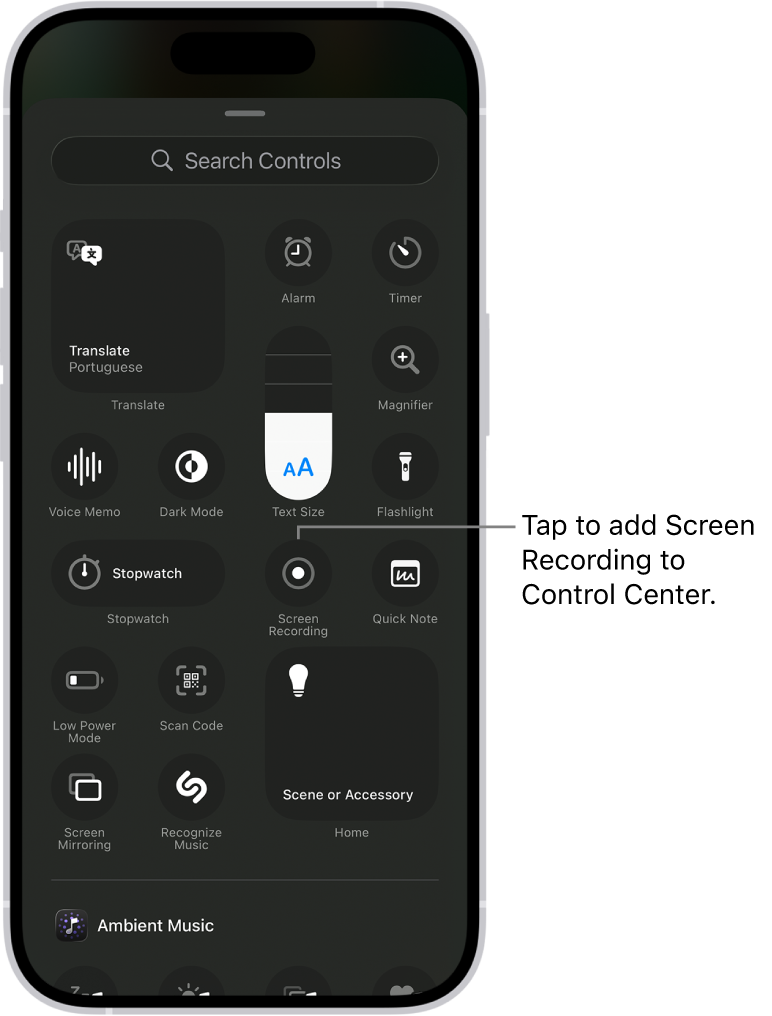
Open Control Center by swiping down from the top-right (or up from the bottom on older iPhones).
Tap the Screen Recording button and wait for the three-second countdown.
Show the app or website you want to explain. Tap the red status bar or Dynamic Island, then Stop to finish.
The screenshot shows iPhone Control Center. Its layout can vary by iOS version and device.
What comes after recording
Turn the raw capture into something people can follow.
Trim the useful moment, choose a clear canvas and export a polished lesson, answer or product walkthrough.
After you record
Turn the raw recording into a clip people can use
Recording is only the first step. Remove the setup and mistakes, make the screen easy to follow, and export the useful moment for the place where you want to share it.
Cut the setup and ending
Keep a little extra footage while recording. In Giflane, drag the handles to select only the part that explains or proves the point.
Make the screen easy to follow
Center the recording, remove an unwanted phone status bar, and add a solid or branded background so the important action stands out.
Export for the destination
Choose GIF for a short looping demonstration, MP4 for social video, or a 9:16 canvas for a YouTube Short.
iPhone recordings appear in Photos. Android recordings usually appear in Google Photos or Gallery, depending on your phone.
Is my recording uploaded?
No. Giflane reads and renders the video in your browser. The source file stays on your device.
What format should I use?
MP4 is the best choice for YouTube and social video. GIF works well for short loops on websites and in newsletters.
How do I remove the iPhone status bar?
Upload the recording, open Style, and enable Crop phone status bar only when you want to remove it.
Cannot find the recording button?
On iPhone, open Control Center, tap Add a Control and choose Screen Recording. On Android, edit Quick Settings and add Screen record. Some models do not have a built-in recorder.